Leaky roofs can be a huge hassle. Not only is it a pain to have to deal with, but it can also cause some serious damage to your home if not taken care of quickly.
In this blog post, we will go over what you should do if you notice a leaking roof. We will discuss the steps that you need to take to mitigate the damage and get your roof fixed as soon as possible!
Look for the signs
If you suspect your roof may be leaking, there are several signs that can help you determine if this is indeed the case. The most obvious sign, of course, is water openly dripping into the interior of your house, though it’s also possible this is part of a plumbing issue.
Water spots on your walls or ceilings, discolored patches on the ceiling, peeling paint around windows and doors, a musty smell in certain rooms, rotting framework wood, and damp insulation are also indicators of a possible roof leak.
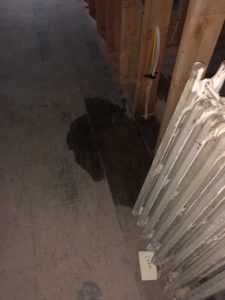
Moisture in attic caused by a leaking roof
Additionally, look out for water stains or streaks on the exterior walls below your rooftop vents and gutters. These could be signs that moisture is getting into your home through an undiscovered opening in the roof.
Protecting your home from water damage and other potential hazards starts with taking the time to spot-check your roof and responding quickly if any problems arise.
Take action – be careful
If left untreated, roof leaks can lead to significant structural damage and compromise your home’s energy efficiency. It is important take proactive steps to address any signs of a roof leak in order to prevent further damage.
Also very important: Be extremely careful if you’re doing anything on or around the roof yourself. If you’re feeling unsure about any part of it, let a professional roofing company handle it.
So, once a roof leak is noticed, it’s important to take action as soon as possible. The first step is to inspect the area around the leak and determine what is causing it. This could be due to damaged asphalt shingles, missing shingles, cracked flashing, or faulty gutter systems. It’s also important to check for signs of water damage in the attic or walls, such as discoloration or mold growth.
After inspecting the source of the leak, repairs must be made right away to prevent further damage. Again, if you’re going to attempt DIY repairs, you should make sure you have all the proper tools and materials before beginning and someone to assist you. Often, replacing shingles or flashing requires special attention, so hiring a professional roofer may be necessary in some cases.
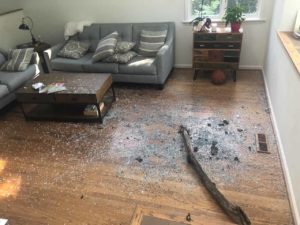
Damage to skylight from a broken tree limb resulted in a roof leak
Find the source of roof leaks
The first step is to identify the source of the leak and determine the severity of any associated damage. If you can safely access the area around the leak, use a flashlight or other light source to inspect it closely for signs of mold, mildew, or water stains. If these signs are present, there may be more extensive damage that needs to be addressed before attempting a repair.
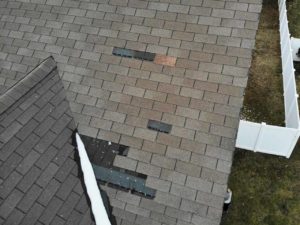
Damaged or missing shingles can cause roof leaks
Once you’ve determined the source of your leak, it’s time to find a temporary solution until you’re able to call a roofing professional to see if it can be repaired or if you need a new roof. Some of the most common methods for temporarily fixing a leaky roof include:
Tar paper/plastic sheeting
Tar paper or plastic sheeting is a relatively easy roofing material to use for a temporary fix. Tar paper is strong, malleable, and weather-resistant – making it an ideal solution for quick fixes on roof damage.
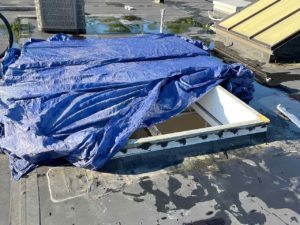
A temporary tarp is placed over a damaged skylight
First, measure the area that needs repair, then cut enough tarp paper to cover it. Next, staple the tar paper into place onto the roof’s surface with galvanized staples or nails. Ensure that all corners and edges are tightly secured. Use a quality roofing adhesive around the perimeter of the patch.
Allow enough time for the adhesive to dry before exposing it to any moisture or weather conditions.
Finally, cover the tar paper with several layers of roof sealant – such as asphalt-based caulking – so each layer is given adequate drying time before applying more.
Using plastic sheeting is an easier process. Make sure the area of the leak or leaks is well covered, and secure it in place with strategically placed weights, using roofing nails into wood wrapped in the sheeting at the edges, or even duct tape in a pinch.
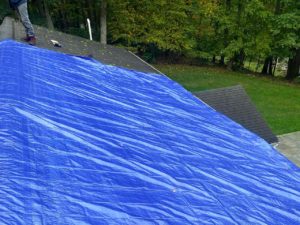
A temporary tarp is placed over a leaking roof
Sealant/tar tape
Roofing sealant or tar tape can be used to seal shingles, flashing, or roof joints. When using sealant (typically made of silicone or urethane), make sure the area is clean and free of debris before applying the sealant.
This allows for a better bond. It is also important to use a brush or roller to spread the sealant, ensuring that all of the cracks are completely covered and they are properly sealed. The sealant should then be allowed to dry for at least 24 hours.
When using tar tape, ensure that you have enough material to cover the area where the leak is; it should be slightly larger than the breach itself.
Apply the tar tape, pressing firmly to ensure that it sticks. Reseal any areas of the tar tape that appear to be coming up due to weather or movement. Allow at least 24 hours for the tar tape to properly adhere.
Caulk is also an option, but it is not recommended over roof sealants or tar tape because it isn’t as durable as the others.
Patching from the inside
You can install a temporary patch from inside your home to cover any obvious holes. If you have an attic, head up there and inspect the area around the leak.
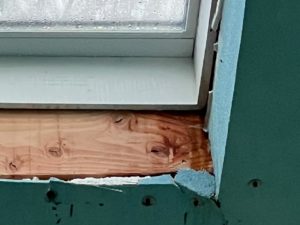
Moisture damage to drywall from a leaking skylight
Look for any signs of rot, discoloration, or other damage. Make sure to check under insulation as well since water can build up there and cause problems.
If possible, patch the leak from inside your attic by using a rolled roofing repair kit or rubberized patching material. These materials will help to seal up small cracks and holes in roofs with minimal effort.
Catch the drips
Of course, there’s always the classic standby if all else fails: Place a bucket or other large container beneath the leak to catch dripping water. As such, if the roof leak isn’t patched, it’ll be necessary to monitor (and dump) the container so water doesn’t run over your floors and exacerbate the situation.
It’s important to note that these measures are meant to be only temporary until you can have a professional assess and repair your roof. If done improperly, they could lead to further damage down the line. To ensure that your home is safe and structurally sound, it’s best to contact a roofing specialist as soon as possible.
Roofing contractors can inspect for leaks, identify problem areas, and provide necessary repairs.
Regular roof maintenance
- Check the inside of your home for water or discoloration on ceilings, walls, and floors.
- Look in attics, crawl spaces, and other areas that may have been affected by a roof leak.
- Inspect around chimneys, old flashing, roof vents, pipes, skylights, and other possible entry points for moisture or other wear and tear.
If you are able to locate the source of the leak (most likely near a pipe or vent that is coming through the roof), then inspect it for cracked caulk or rust spots.
- Check all surrounding shingles on your roof for any signs of damage such as curling, blistering, or missing sections due to hail or strong winds. This may have compromised the roof sheathing.
- Make sure gutters are clear of debris and that downspouts are properly draining water away from your home.
If you find any of these issues, contact Gunner for an inspection and repair. In some cases, it may be necessary to replace the whole roof.
Looking at the big picture
To prevent future roof leaks, have your roof inspected at least twice a year by a professional or take on regular maintenance yourself, such as cleaning gutters and checking shingles for damage. Doing so will save you money in the long run as well as assure that your roof is strong and secure against further weather elements.
When it comes to the health and safety of your family, your first line of defense should always be preventing costly damage by ensuring that you have a secure, properly maintained roof over your head. Protecting your home from water damage and other potential hazards starts with taking the time to spot-check your roof and responding quickly if any problems arise.